Are you a stargazing enthusiast looking to take your observing experience to the next level? Well, you're in luck! In this blog post, I'll be sharing with you my top 10 ideas for telescope accessories that can truly enhance your time under the night sky. Whether you're a beginner or a seasoned observer, these accessories are guaranteed to bring your stargazing adventures to new heights. So, grab your telescope and get ready to discover the world beyond our planet like never before. Let's dive in!
Table of Contents
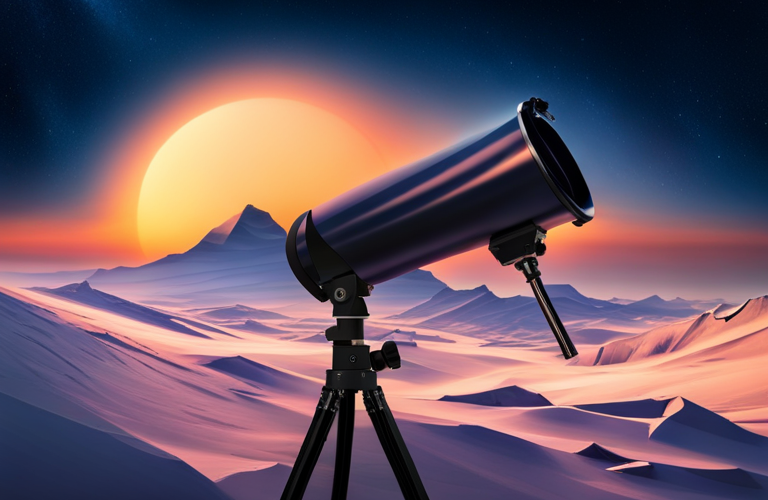
Tripod Mounts: Stabilize your telescope
Tripod Mounts: Stabilize your telescope
Having the right accessories for your telescope can greatly enhance your observing experience. One essential accessory that often gets overlooked is a tripod mount. A stable tripod mount is crucial for long-duration observations and astrophotography. It allows you to keep your telescope steady and minimizes vibrations, resulting in clearer and sharper images. In this article, we will provide you with some useful tips and tricks on selecting and utilizing tripod mounts for your telescope.
1. Choose a sturdy tripod: When selecting a tripod mount, opt for one made from durable materials such as aluminum or carbon fiber. Look for a model that can support the weight of your telescope and any additional accessories you may have. A tripod with adjustable legs is also beneficial for ensuring stability on uneven ground.
2. Check for compatibility: Ensure that the tripod mount you choose is compatible with your telescope model. Consider factors such as weight capacity and attachment options. Some telescopes may require specific adapters or brackets to be securely mounted on the tripod.
3. Utilize vibration-reducing pads: Place vibration-reducing pads on the tripod legs to help minimize any residual vibrations. These pads absorb shock and distribute the weight evenly, further enhancing stability during observation or astrophotography sessions.
4. Level your tripod: A level tripod is essential for accurate tracking and smooth movements. Use a bubble level or smartphone app to ensure that your tripod is perfectly level. Adjust the leg lengths accordingly to achieve a stable setup.
5. Secure your telescope: Once you have mounted your telescope on the tripod, make sure it is properly secured. Double-check all screws and connections to prevent any accidental slips or movements during use.
6. Consider counterweights: If you have a telescope with a heavy optical tube or if you plan on attaching several accessories, counterweights can help balance the load. This ensures that your telescope remains steady and eliminates the risk of it tipping over due to imbalance.
7. Regular maintenance: Keep your tripod mount in good condition by regularly inspecting for any signs of wear or damage. Lubricate moving parts if necessary and clean the tripod after each use to remove any dirt or debris.
Remember, investing in a high-quality tripod mount is crucial for stabilizing your telescope and obtaining clear and crisp views of the night sky. By following the tips and tricks mentioned above, you can enhance your observing experience and capture stunning images through your telescope. Explore the world of telescope accessories and unlock the full potential of your astronomical adventures.
Eyepieces: Magnify your view
Eyepieces: Magnify Your View – Creative and Attractive Telescope Accessories
When it comes to enhancing your stargazing experience, the right telescope accessories can make all the difference. Among these, eyepieces play a vital role. These small but powerful devices are designed to magnify your view, allowing you to observe celestial wonders with incredible clarity. In this article, we will explore some tips and tricks to help you make the most of eyepieces and enhance your telescope experience, while staying focused on the keywords – telescope accessories.
1. Determine your desired magnification: Eyepieces come in various focal lengths, which directly affect the level of magnification. Research and understand your telescope's specifications to determine the ideal focal length range for your desired viewing experience. This will help you choose eyepieces that align with your needs.
2. Invest in quality eyepieces: While it may be tempting to opt for cheaper options, investing in good-quality eyepieces can significantly enhance your viewing experience. Higher-quality eyepieces often offer better optics, wider fields of view, and improved overall performance. Look for reputable brands and read reviews to make an informed decision.
3. Understand eyepiece designs: Eyepieces come in different designs, including the Huygens, Ramsden, Kellner, Plossl, and more. Each design offers unique qualities and characteristics, such as field of view, eye relief, and distortion levels. Understand these designs to choose the one that best suits your preferences and requirements.
4. Experiment with different magnifications: Owning a range of eyepieces with varying focal lengths allows you to experiment with different magnifications. Different celestial objects and atmospheric conditions may require different magnification levels for optimal viewing. Having a collection of eyepieces enables you to adapt to various scenarios and maximize your observations.
5. Consider additional accessories: Eyepieces can be complemented with other accessories like eyepiece filters, which enhance specific colors or block out unwanted light. Moreover, invest in suitable eyepiece cases or organizers to keep your collection organized, protected, and readily accessible.
6. Clean and maintain your eyepieces: Proper care and maintenance are essential to ensure optimal performance and longevity of your eyepieces. Regularly clean the lenses using recommended methods and store them appropriately to prevent scratches or dust accumulation. Well-maintained eyepieces will provide clearer views and better overall experiences.
7. Seek advice and guidance: Join astronomy forums or local astronomy clubs to connect with experienced enthusiasts and seek advice on telescope accessories, including eyepieces. These communities often have seasoned members who can offer valuable insights and recommendations based on their own experiences.
Remember, with the right combination of eyepieces and other telescope accessories, you can unlock a whole new world of celestial observation. Whether you are a casual stargazer or a dedicated astronomer, leveraging these tips and tricks related to telescope accessories will help you make the most of your eyepieces and elevate your stargazing adventures. Happy stargazing!
Barlow Lenses: Increase magnification
Idea Title: Barlow Lenses: Enhancing Magnification for an Enriched Observing Experience with Telescope Accessories
The concept of using barlow lenses as telescope accessories is both creative and attractive. By incorporating these lenses into your stargazing equipment, you can significantly increase magnification and enhance your observing experience. When combined with other essential telescope accessories, such as eyepieces, filters, mounts, tripods, cases, dew shields, finder scopes, astrophotography tools, collimation tools, diagonals, focusers, guide scopes, and light pollution filters, barlow lenses can take your astronomy pursuits to new heights. Here are some tips and tricks to make the most of these telescope accessories:
1. Choose the right barlow lens: Opt for a quality barlow lens that matches your telescope's focal length and requirements. Consider variables like magnification factor and optical design to ensure excellent image quality.
2. Pair with appropriate eyepieces: Complement your barlow lens with compatible eyepieces. Combined, they will provide different levels of magnification, allowing you to observe celestial objects at various distances and details.
3. Experiment with different magnifications: Try different eyepiece-barlow lens combinations to find the ideal magnification for different celestial targets. Higher magnifications are suitable for observing close-ups of the moon, planets, and specific deep-sky objects, while lower magnifications work best for wider fields of view.
4. Utilize filters for enhanced observations: Combine your barlow lens with filters to improve contrast, reduce glare, or highlight specific wavelengths of light. Filters can enhance details on planets, nebulae, and other astronomical objects, making your observations more rewarding.
5. Ensure a stable setup: Invest in a sturdy telescope mount and tripod to minimize vibrations and ensure stable observations. Even the best telescope accessories can be hindered by shaky support systems, so prioritize stability for optimal results.
6. Protect and transport your equipment: Utilize a well-padded telescope case to safeguard your valuable accessories during transport and storage. Proper handling and protection will ensure longevity and prevent damage to your barlow lens and other accessories.
7. Reduce dew formation with a dew shield: Attach a dew shield or heating element to your telescope to prevent dew formation on lenses and accessories. This is especially important when conducting extended observation sessions in humid environments.
8. Fine-tune through collimation: Regularly check and adjust the alignment of your telescope's optics with collimation tools. Proper collimation helps optimize the performance of your barlow lens and other accessories, ensuring clear and crisp images.
9. Employ diagonals for comfortable viewing: Utilize diagonal mirrors or prisms to achieve a comfortable viewing angle when observing celestial objects near zenith. Diagonals also help prevent neck strain during extended observations.
10. Complement with astrophotography tools: If you're venturing into astrophotography, consider integrating your barlow lens into the setup. Combined with a guide scope and proper astrophotography accessories, the barlow lens can facilitate high-resolution imaging of planets and other detailed objects.
11. Reduce light pollution: Incorporate a light pollution filter to enhance observations from areas with excessive artificial lighting. This filter helps improve contrast and visibility by blocking out unwanted light, allowing you to observe fainter objects more effectively.
By incorporating these tips and tricks while utilizing barlow lenses together with other telescope accessories, you can maximize your observing experience and uncover the wonders of the universe with greater magnification and clarity.
Motor Drives: Automate tracking
Tips and Tricks: Motor Drives to Automate Tracking for Telescopes
1. Research and Compatibility: Before investing in a motor drive system for your telescope, thoroughly research its compatibility with your telescope model. Inquire about specific telescope accessories that might be required for seamless integration.
2. Performance and Accuracy: Look for motor drives that offer smooth and precise tracking performance. A high-quality motor drive will ensure accurate tracking, minimizing the need for constant manual adjustments during long observing sessions.
3. Ease of Installation: Consider motor drives that are easy to install and operate, especially if you are not familiar with telescope accessories. Look for comprehensive instructions, online tutorials, or customer support to assist you during the installation process.
4. Power Options: Opt for motor drives that offer flexible power options. Some drives are compatible with batteries, while others can be connected to an external power source. Choosing the option that suits your observing needs will provide uninterrupted and long-lasting tracking.
5. Mount Compatibility: Verify whether the motor drive is suitable for your specific telescope mount. Different motor drives cater to different mounts, such as equatorial mounts or altazimuth mounts. Ensure compatibility to achieve effective automation.
6. Tracking Modes: Explore motor drives that offer different tracking modes to suit your observing requirements. Common modes include sidereal, lunar, solar, or custom tracking. Each mode will track celestial objects differently, so select the appropriate tracking mode for your observations.
7. Programmable Features: Consider motor drives that allow programming features for automated tracking. Some drives permit storing specific coordinates and programs to track multiple objects seamlessly.
8. Upgradeable Systems: Look for motor drives that can be upgraded with additional features or firmware updates. This will extend the functionality of your drive and ensure compatibility with future telescope accessories or advances in automation technology.
9. Portability and Weight: If you frequently travel with your telescope, consider motor drives that are lightweight and portable. This will enhance ease of transportation and setup while providing automated tracking capabilities wherever you go.
10. User Reviews and Recommendations: Before making a final purchase decision, read user reviews and recommendations for different motor drives. These insights from experienced users can provide valuable guidance in selecting the ideal motor drive that meets your specific needs.
Remember to consider these tips and tricks while researching and selecting motor drives to automate tracking for your telescope. By utilizing the right telescope accessories, you can enhance your stargazing experience and capture stellar moments with ease.
Computerized Finders: Automate pointing
Idea Title: Computerized Finders: Automate Pointing
The concept of using computerized finders to automate pointing in telescope accessories is a creative and attractive idea that brings convenience and accuracy to stargazers and astronomers. By combining technological advancements with the world of telescopes, this idea revolutionizes the way we navigate the night skies. To help you explore this idea further, here are some tips and tricks focusing on telescope accessories:
1. Explore GPS Systems: Consider incorporating GPS (Global Positioning System) technology into computerized finders. GPS-enabled finders can accurately determine your location on Earth, allowing the computerized system to calculate the position of celestial objects in the sky. This feature enables automated pointing by aligning the telescope precisely with your desired target.
2. Connectivity and Compatibility: Ensure that computerized finders are designed with connectivity options. This allows them to communicate with other telescope accessories, such as star maps or mobile applications. Compatibility with commonly used devices can enhance the user experience and provide real-time tracking and object identification.
3. User-Friendly Interfaces: Design the computerized finders with intuitive user interfaces to make them accessible to beginners and experienced users alike. Incorporate clear instructions, touchscreens, or user-friendly buttons, enabling quick and effortless navigation and alignment.
4. Object Databases: Develop an extensive database of celestial objects, including stars, galaxies, planets, and other deep-sky objects. The computerized finders can then quickly locate and point towards these objects based on user input or predefined settings. Regularly updating the database ensures access to the latest discoveries and accurate tracking.
5. Manual Input Options: While automating pointing is the main aspect of this idea, including manual input options is crucial. Users may want to explore objects not present in the database or objects they discover themselves. Incorporating manual input features allows enthusiasts to manually align the telescope and explore their unique interests.
6. Adaptive Systems: Consider implementing adaptive systems that can track and predict the movements of celestial objects. As Earth rotates and objects move across the night sky, an adaptive computerized finder can continuously adjust its pointing and tracking to keep the desired object centered within the telescope's field of view.
7. Integrated Calibration: Include an integrated calibration feature in computerized finders to ensure precise alignment. Calibration helps in compensating for factors such as polar alignment, optical aberrations, or equipment variations that may affect the accuracy of pointing and tracking.
8. Power Management: Efficient power management is essential for computerized finders. Incorporate energy-saving modes or power options that balance performance and battery life. Consider utilizing rechargeable batteries to minimize the environmental impact and provide consistent power supply to the automation system.
Using computerized finders to automate pointing in telescope accessories presents an exciting opportunity to enhance the astronomy experience, allowing enthusiasts to explore the depths of the universe with accuracy and ease. By considering the tips and tricks mentioned above and focusing on the keywords “telescope accessories,” this idea can be further developed into a game-changer for astronomy enthusiasts of all skill levels.
Filters: Enhance contrast
Filters: Enhance Contrast with Telescope Accessories
When it comes to enhancing contrast in telescopic observations, filters are indispensable telescope accessories. These accessories can greatly improve the overall viewing experience by reducing glare and enhancing details of celestial objects. Below are some tips and tricks on how to effectively use filters to enhance contrast with your telescope:
1. Explore different filter types: There are various filter types specifically designed to enhance contrast, such as the Moon filter, Nebula filter, and Light Pollution filter. Each filter is optimized for different types of observations. Experiment with different filter types to find the one that best suits your viewing preferences.
2. Reduce glare with Moon filters: Moon filters are ideal for observing Earth's natural satellite, as they decrease the brightness and glare caused by its reflection of sunlight. These filters enhance the lunar surface details, allowing you to see the craters, mountains, and other intriguing features with improved contrast.
3. Reveal nebulae with Nebula filters: Nebula filters aid in observing diffuse nebulae by blocking specific wavelengths of light pollution, thus enhancing the contrast of the nebula against the background sky. They bring out the intricate structures and delicate details that would otherwise be challenging to discern.
4. Combat light pollution with Light Pollution filters: Urban areas often suffer from light pollution, which can significantly diminish the visibility of celestial objects. Light Pollution filters selectively block certain wavelengths of artificial light, allowing you to enjoy darker skies and improved contrast. These filters are particularly beneficial for observing deep-sky objects, such as galaxies and star clusters.
5. Experiment with different eyepiece and filter combinations: To achieve the desired level of contrast enhancement, it is essential to experiment with different eyepiece and filter combinations. Consider combining different filters with different eyepieces to find the optimal combination for a specific object or observation. Not all filters work well with every celestial object, so it's important to find the right match.
6. Take care of filter cleanliness: Proper maintenance of filters is crucial for obtaining the best possible contrast enhancement. Clean the filters regularly using specialized cleaning solutions and materials recommended by the manufacturer. Ensure that no smudges, dust, or debris are obstructing the filter's performance.
7. Follow instructions: Every filter comes with specific instructions provided by the manufacturer. It is important to carefully read and follow these instructions to ensure their optimal functioning and longevity. Additionally, always handle filters with care to avoid any damage or scratches that may affect their performance.
By utilizing the right filters for your telescope and following these tips and tricks, you can significantly enhance contrast in your observations. Whether you want to explore the detailed lunar surface, unveil the hidden beauty of nebulae, or combat light pollution in urban areas, filters are essential accessories that can take your stargazing experience to a whole new level.
Diagonals: Improve comfort
Tips and Tricks to Improve Comfort with Diagonals – Telescope Accessories
1. Choose a high-quality diagonal: When it comes to telescope accessories, investing in a good quality diagonal can greatly enhance your viewing experience. Look for diagonals that offer high reflectivity, minimal light scatter, and low image distortion for optimum comfort.
2. Opt for a dielectric coated diagonal: Dielectric coatings on diagonals provide better light transmission, resulting in brighter and more detailed views. These coatings also reduce chromatic aberration, ensuring sharp and clear images. This can significantly improve your viewing comfort, especially during extended observation sessions.
3. Consider an adjustable-angle diagonal: Look for diagonals that feature adjustable angles. These allow you to fine-tune the viewing position and find the most comfortable viewing angle for your observation setup. Adjusting the diagonal to suit your specific eye level can prevent neck strain and enhance overall comfort.
4. Use a diagonal with a twist-lock mechanism: Some diagonals come with a twist-lock mechanism that securely holds your eyepiece in place. This feature prevents accidental eyepiece rotation and ensures a more stable and comfortable viewing experience, especially when observing at different angles.
5. Utilize a lightweight diagonal design: Diagonals can add weight to your telescope setup, potentially affecting the balance and ease of use. Look for lightweight diagonal options that offer durability without compromising on performance. This will reduce the strain on your telescope mount and make it more comfortable to handle.
6. Explore adjustable interpupillary distance (IPD) diagonals: If multiple users will be using the telescope, consider diagonals with adjustable IPD settings. This allows you to customize the distance between the eyepieces for each observer, catering to individual comfort preferences and maximizing the enjoyment of the viewing experience.
7. Pair diagonals with ergonomic eyepieces: To further enhance comfort, consider using ergonomic eyepieces along with the diagonals. Eyepieces with comfortable eye relief and adjustable eye cups can minimize eye strain and improve overall viewing comfort, particularly for eyeglass wearers.
8. Use anti-vibration features: Diagonals with anti-vibration components, such as internal baffles or shock-absorbing materials, can minimize image shake caused by external disturbances. This helps maintain a steady view, making your observations more comfortable and enjoyable.
Remember, when it comes to telescope accessories like diagonals, prioritizing comfort can greatly enhance your astronomy experience. By considering these tips and tricks, you can optimize your viewing sessions and enjoy the wonders of the night sky with enhanced ease and comfort.
Collimators: Align optics
Tips and Tricks for Using Collimators: Aligning Optics for Telescope Accessories
1. Understanding Collimators: Collimators are essential accessories for telescopes used to align optics. They help you achieve precise alignment between the telescope's primary mirror and secondary mirror, ensuring optimal performance.
2. Components of a Collimator: A collimator typically consists of a laser module, a collimating lens, and an adjustable housing. The laser module emits a beam of light, which passes through the collimating lens and emerges as a parallel beam. The adjustable housing allows you to align the collimator with the telescope's optical axis.
3. Initial Setup: Before using a collimator, ensure that your telescope is properly collimated using other methods. Collimators are most effective in fine-tuning the alignment rather than correcting major misalignment issues.
4. Mounting the Collimator: Attach the collimator to the telescope using the appropriate adapter or a dedicated mounting system. Make sure it is securely mounted and aligned with the telescope's optical axis.
5. Using the Laser Light: Switch on the laser module and observe the laser beam. If the laser produces a visible dot on a target surface, it indicates the collimator is working correctly. Adjust the collimator's position and alignment until the dot is centered on the target.
6. Multiple Reflections: Some telescopes have a complex optical path with multiple mirrors. In such cases, consider using a collimator with a built-in reflex sight that allows you to visualize and adjust the alignment for each mirror one at a time.
7. Achieving Ideal Alignment: To achieve optimal alignment, adjust both the primary and secondary mirrors. The goal is to ensure that the laser beam reflects back onto the collimator, indicating perfect alignment.
8. Fine-Tuning the Alignment: Once you have achieved initial alignment, use the collimator to finely adjust the optics. Observe any deviations or astigmatism in the laser dot and make necessary adjustments to correct them.
9. Regular Maintenance: Collimators need proper care and maintenance to ensure accurate alignment. Keep the collimating lens clean and free from dust or debris. Inspect the collimator's alignment periodically and readjust if necessary.
10. Collimation Verification: After using a collimator, it is advisable to verify the alignment by observing celestial objects through the telescope. If the images appear clear, sharp, and well-focused, the collimator has effectively aligned the optics.
Remember, properly aligning the optics of a telescope using collimators is crucial for obtaining the best possible views of the universe. Investing time and effort in mastering the use of collimators will greatly enhance your observing experience.
Adaptors: Expand compatibility
A telescope adaptor is one of the most important tools when it comes to expanding the compatibility of telescope accessories, as it allows you to connect eyepieces, filters, and cameras to telescopes that have different mountings or connections. Here are some tips and tricks to consider when using adaptors for telescope accessories:
1. Research and identify compatibility: Before purchasing any adaptors, thoroughly research and understand the compatibility between your telescope and the accessory you wish to attach. Look for information regarding thread sizes, mounting methods, and connection types to ensure a proper fit.
2. Eyepiece adaptors: Eyepiece adaptors help connect eyepieces with different diameters to your telescope. When dealing with different sizes, consider using step-up or step-down rings to ensure a secure fit. These rings simply thread onto the eyepiece or adaptor to change the diameter and maintain compatibility.
3. T-adapter for astrophotography: To attach a camera to your telescope for astrophotography, a T-adapter is often required. This adaptor allows you to connect your camera directly to the telescope's focuser, replacing the eyepiece. Ensure that the T-adapter is compatible with your specific camera model and telescope.
4. Barlow lens adaptors: Barlow lenses are popular for magnifying the image seen through the eyepiece. Certain telescopes may have specific adaptors designed to work seamlessly with their proprietary Barlow lenses. Always check if your telescope has dedicated adaptors to optimize the performance of its Barlow lens.
5. Filter adaptors: Filters enhance observations by reducing light pollution and enhancing specific wavelengths. Depending on your telescope and filter type (such as threaded or slide-in), you may require different adaptors to attach them. While some telescopes feature built-in filter threads, others may require additional adapters to securely mount filters.
6. Collimation adaptors: Collimation is the process of aligning the optical elements of a telescope. Collimating adaptors make this process easier and more accurate. They help adjust the alignment between mirrors or lenses, ensuring optimal performance. Investigate if your telescope model has specific adaptors available for collimation purposes.
7. Seek guidance from manufacturers: If you are uncertain about the compatibility or the particular adaptors needed for your telescope accessories, reach out to the manufacturers or consult fellow astronomers. They can provide expert advice tailored to your equipment, ensuring you select the right adaptors for your needs.
By utilizing adaptors, you can expand the compatibility of telescope accessories, enabling you to connect various components seamlessly. Always ensure you have the correct adaptors for your specific telescope model and accessories to optimize your viewing or imaging experience.
Covers: Protect from dust
Tips and Tricks for Telescope Accessories: Covers to Protect from Dust
1. Importance of Dust Protection: Dust and debris can significantly affect the performance and longevity of telescope accessories. Hence, using covers to protect them is essential. Here are some useful tips to consider:
2. Proper-Sized Covers: Ensure that you choose covers that fit your specific telescope accessories snugly. Ill-fitting covers may not provide adequate protection against dust and debris. Look for accessories that offer custom sizes or adjustable options to ensure a perfect fit.
3. Material Selection: Opt for covers made from high-quality, dust-resistant materials. Common options include nylon, polyester, or neoprene, which provide excellent protection against dust particles while being durable and easy to clean.
4. Full Coverage: Look for covers that offer full coverage for your telescope accessories. These covers not only protect the top but also provide protection from the sides and bottom. Consider covers with elasticized edges or drawstrings to ensure a secure fit and complete coverage.
5. Ease of Use: Choose covers that are easy to put on and take off. Covers with zippers or Velcro closures are convenient options as they allow for quick access to your accessories while providing a secure seal against dust when not in use.
6. Proper Storage: When not in use, always store your telescope accessories with covers on to protect them from accumulating dust. Additionally, consider storing them in a dust-free environment, such as a clean, dry cabinet or storage case.
7. Regular Cleaning: Even with covers, it's important to regularly clean your telescope accessories. Use a soft brush or compressed air to gently remove any dust or debris that may have settled on the covers. Avoid using harsh chemicals or abrasive materials, as they can damage the covers and accessories.
8. Maintenance Routine: Develop a maintenance routine for your telescope accessories that includes checking the covers for any signs of wear or tear. Replace damaged covers promptly to ensure continued protection.
9. Specialized Covers: Depending on the specific accessories you own, consider investing in specialized covers. Some accessories, such as eyepieces or filters, may require additional protective features like padded interiors or extra layers to guard against impacts along with dust protection.
10. User Reviews and Recommendations: Before purchasing covers for your telescope accessories, read reviews and seek recommendations from other telescope enthusiasts. They can provide valuable insights and help you choose the best covers that meet your specific needs.
By following these tips and tricks for using covers to protect your telescope accessories from dust, you can ensure their longevity and maintain optimal performance for years to come. Remember, prevention is key when it comes to protecting delicate equipment from potential damage caused by dust particles.
Final Words
The world of telescope accessories is vast and diverse, and offers countless ways to make your viewing experience even better. The accessories you can purchase for navigating the night sky can revolutionize your experience, from tripod mounts that stabilize your telescope to motor drives and computerized finders that automate tracking and pointing. By investing in the right combination of accessories, you can improve your life as a stargazer by taking your hobby to new heights of ease and precision. Whether you are a seasoned astronomer or just starting out, don't underestimate the power of these tools in enhancing your observing experience. With the right telescope accessories, you can delve deeper into the cosmos, uncovering hidden wonders and finding a new appreciation for the vastness of our universe. So, take the plunge and explore the possibilities – your journey to the stars awaits!


Add comment