So, you’re wondering how to pick up a microphone in the mesmerizing style of FKA twigs? Look no further! In this article, we’ll give you some insider tips and tricks on how to channel the unique elegance and captivating presence of this talented artist when you pick up a mic. Whether you’re a budding singer, a spoken word poet, or someone who simply wants to command the stage with confidence, this guide will help you embody the essence of FKA twigs and make a lasting impression with your microphone skills. Get ready to captivate your audience and leave them in awe of your performance!

Table of Contents
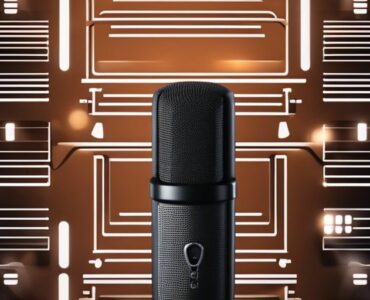
Choosing the Right Microphone
When it comes to selecting a microphone, it’s important to consider the purpose for which you’ll be using it. Are you a vocalist looking for a microphone to use in live performances? Or perhaps you’re a podcaster in need of a reliable microphone for recording your episodes. Whatever your needs may be, taking the time to understand the different microphone types available will help you make an informed decision.
Consider the Purpose
First and foremost, think about the purpose of your microphone. Different microphones are designed to excel in specific applications. For example, dynamic microphones are often preferred for live performances due to their ruggedness, while condenser microphones are known for their sensitivity and accuracy, making them ideal for studio recording. Understanding the purpose will guide you towards the microphone that best suits your needs.
Research Fka Twigs’ Microphone Preferences
If you’re a fan of Fka Twigs and admire her unique style, take some time to research her microphone preferences. Fka Twigs is known for her distinct sound and artistic approach, so understanding the equipment she uses can offer valuable insights. Look for interviews or articles where she discusses her microphone choices and why she prefers them. While it’s essential to find a microphone that aligns with your own preferences, examining the choices of successful artists can be a helpful starting point.
Understand Different Microphone Types
To make an informed decision, let’s delve into the various microphone types available. Dynamic microphones are reliable and durable, making them suitable for live performances or capturing powerful vocals. Condenser microphones, on the other hand, offer greater sensitivity and accuracy, making them a popular choice for studio recordings where capturing intricate details is crucial. Ribbon microphones are cherished for their smooth and warm sound reproduction, often used to add a vintage touch to recordings. By understanding the strengths of each microphone type, you can select the one that best suits your needs and preferences.
Microphone Features and Specifications
When choosing a microphone, it’s essential to consider its features and specifications. These factors can greatly impact the sound captured and overall performance.
Frequency Response
The frequency response of a microphone refers to its ability to accurately capture sound across the audible range of human hearing. It is usually represented in a frequency chart, indicating how the microphone responds to different frequencies. Pay attention to the frequency response when selecting a microphone, as it will determine how well it reproduces the nuances of your voice or instrument.
Polar Pattern
Another crucial factor to consider is the microphone’s polar pattern. The polar pattern determines the directionality of the microphone and how it captures sound. Popular polar patterns include cardioid, which is most sensitive to sound coming from the front and rejects sound from the back, and omnidirectional, which captures sound equally from all directions. Choose a polar pattern that suits the recording environment and your intended use.
Sensitivity
Microphone sensitivity refers to how effectively it converts sound into an electrical signal. High sensitivity microphones are more responsive, capturing even the subtlest nuances, but they may also be more prone to picking up background noise. In contrast, low sensitivity microphones require louder sound sources to produce a signal but offer greater resistance to unwanted noise. Consider your specific recording needs when choosing a microphone with the appropriate sensitivity.
Impedance
Impedance refers to the microphone’s resistance to the flow of electric current. Matching the microphone’s impedance with the input impedance of your audio interface or mixer is crucial for optimal audio quality. A mismatch in impedance can result in a loss of signal strength or introduce unwanted noise. Check the specifications of both your microphone and audio equipment to ensure compatibility.
Noise Handling
Microphones vary in their ability to handle noise. Some microphones have built-in noise-cancelling features or are designed to minimize the pickup of ambient noise, making them ideal for recording in noisy environments. Consider your recording environment and the level of background noise you anticipate, and choose a microphone that can effectively handle it.
Durability
Durability is an important factor to consider, especially if you’ll be using the microphone in live performances or on-the-go situations. Look for microphones that are built to withstand wear and tear, with features such as robust construction, shock mounts, and protective cases. Investing in a durable microphone ensures its longevity and reliability in various environments.
Microphone Placement
Proper microphone placement plays a crucial role in capturing clear and balanced audio. Experimenting with different techniques and utilizing the appropriate tools can greatly enhance the sound quality and overall performance.
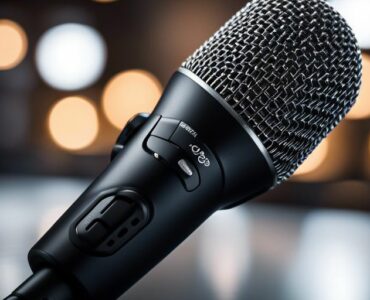
Experiment with Handheld Techniques
When using a handheld microphone, it’s important to experiment with different techniques to find the one that suits your voice and style. Adjusting the distance between your mouth and the microphone can greatly impact the sound captured. Experiment with holding the microphone closer or further away from your mouth to find the sweet spot that delivers the desired tone and volume.
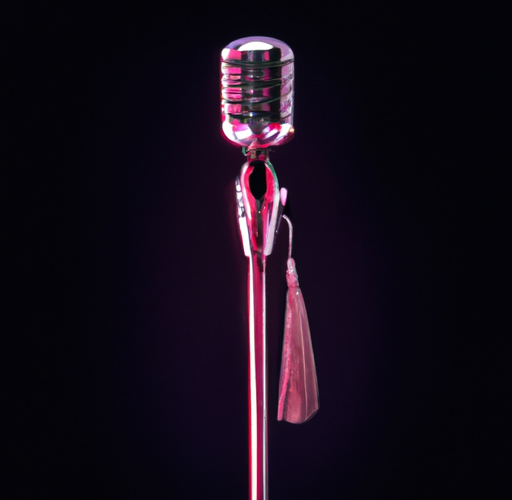
Utilize a Microphone Stand
Using a microphone stand can provide stability and allow you to focus on your performance without worrying about holding the microphone. It also helps improve consistency in microphone placement, as you can set it up at the perfect height and angle. Consider the type of microphone stand that best suits your needs, whether it’s a traditional floor stand, a desk stand, or a boom arm for more flexibility.
Try Wireless Microphone Systems
Wireless microphone systems offer freedom of movement and eliminate the need for tangled cables. They can be particularly useful in live performances or situations where you need to move around. When using a wireless system, it’s essential to choose one with a reliable range and ensure a secure connection to prevent dropouts or interference.
Working with Microphone Accessories
In addition to selecting the right microphone, utilizing appropriate accessories can further enhance your audio quality and performance.
Pop Filters and Windscreens
Pop filters and windscreens are essential accessories for reducing plosive sounds and minimizing unwanted breath noises. Pop filters are typically placed between the microphone and the performer, intercepting fast-moving air caused by words with “P” and “B” sounds. Windscreens, on the other hand, create a barrier around the microphone, reducing wind noise and other external interference. Consider adding these accessories to maintain a clean and professional sound.
Microphone Stands and Booms
A secure and adjustable microphone stand or boom arm is an essential accessory for stability and convenience during recording or performances. They allow you to position the microphone precisely, ensuring optimal sound capture. Choose a stand that suits your specific needs, whether it’s a floor stand, desk stand, or a boom arm that offers greater flexibility and reach.
Cables and Adapters
Cables and adapters are often overlooked but can greatly impact the audio quality. Ensure you have reliable cables with proper shielding to minimize interference and signal degradation. Additionally, having an assortment of adapters on hand will allow you to connect your microphone to various audio devices without compatibility issues.
Shock Mounts
Shock mounts are designed to reduce mechanical vibrations that can be transmitted through the microphone stand. They isolate the microphone from the stand, minimizing handling noise and preventing low-frequency rumble. Consider using a shock mount, especially when recording in environments prone to vibrations or movement.

Microphone Techniques
Mastering microphone techniques can greatly enhance your vocal performance and overall sound quality. Understanding and applying various techniques can help you achieve the desired tone, control, and expression.
Mastering Breathing Control
Breathing control is crucial for vocalists to maintain consistent sound and sustain long notes. Proper breath control allows for better dynamics, control over pitch, and overall vocal endurance. Practice diaphragmatic breathing techniques to ensure efficient breath support and controlled vocal delivery.
Proximity Effect
Understanding and utilizing the proximity effect can add depth and warmth to your vocals. The proximity effect refers to the increase in bass frequencies when the sound source (your mouth) is closer to the microphone. Experiment with different distances to the microphone to find the sweet spot that enhances the desired tonal qualities of your voice.
Microphone Movements
Explore the creative potential of microphone movements during your performance. Moving closer or further away from the microphone can create dynamic changes in volume and tone. Experiment with subtle movements or dramatic sweeps to add artistic flair to your vocals. However, be cautious not to compromise the clarity or consistency of your sound.
Embrace Vocal Effects
Experimenting with vocal effects can give your performance a unique touch. Whether it’s adding reverb for a dreamy atmosphere, utilizing delay for an echo effect, or experimenting with harmonizers and pitch correction, vocal effects can add depth and dimension to your sound. However, use effects sparingly and tastefully to maintain clarity and avoid overwhelming your vocals.
Setting Up a Vocal Booth
Creating a conducive environment for recording vocals is essential to ensure optimal sound quality. Setting up a vocal booth helps control unwanted reflections, background noise, and ensures a clean and focused recording.
Selecting the Right Space
Choose a room or area for your vocal booth that provides isolation and minimal background noise. Ideally, select a small or medium-sized room with minimal hard surfaces. Avoid rooms with excessive echo or ambient noise, such as those near busy streets or with thin walls. If necessary, consider using soundproofing materials or constructing a makeshift vocal booth within an existing room.
Acoustic Treatment
Treating the walls of your vocal booth with acoustic panels or foam can greatly improve sound quality by reducing unwanted reflections. These treatments help minimize echo and flutter echoes, resulting in a cleaner and more professional sound. Experiment with panel placement and consider diffusers to further enhance the acoustics of your vocal booth.
Soundproofing
To prevent external noise from entering your vocal booth and interfering with your recordings, soundproofing is essential. Use insulation materials, seals for doors and windows, and acoustic barriers to minimize sound transmission. This helps maintain a quiet and controlled environment, allowing you to capture your vocals without unwanted distractions or disturbances.
Equipment for Vocal Booth
Equipping your vocal booth with essential tools and equipment enhances your recording experience. Invest in a reliable audio interface or preamp, quality headphones for monitoring, and a pop filter or windscreen to minimize plosive sounds. Additionally, consider installing proper lighting and a comfortable chair to ensure a pleasant recording environment.

Microphone Equalization and Effects
Fine-tuning your microphone’s sound using equalization (EQ) settings and incorporating various effects can add the finishing touches to your audio production.
EQ Settings
Equalization allows you to adjust the frequency balance of your vocals, emphasizing or reducing specific frequencies to achieve a desired tonal quality. Experiment with various EQ settings to enhance the characteristics of your voice or instrument. Boosting the treble frequencies can add brightness and clarity, while reducing low frequencies can minimize muddiness or rumble.
Compression
Compression helps control the dynamic range of your vocals, evening out volume fluctuations and adding consistency. It reduces the loud peaks and brings up softer parts, resulting in a more polished and professional sound. Use compression sparingly and adjust the settings according to the characteristics of your voice and the desired level of dynamic control.
Reverb and Delay
Reverb and delay effects can add depth and spatial ambience to your vocals. Reverb simulates the natural reflections of sound in different environments, while delay creates echoes and repeats of the original sound. Use these effects judiciously, considering the genre and mood of your performance to enhance the overall sonic experience.
Harmonizer and Pitch Correction
Harmonizers are tools that generate harmonies and add additional vocal layers. They can create lush harmonies or thicken your vocals for a fuller sound. Pitch correction software can also be used to correct slight pitch inaccuracies or to achieve specific stylistic effects. Experiment with these tools to enhance your vocal performance while maintaining a natural and authentic sound.
Practice and Vocal Preparation
Improving your vocal skills and ensuring proper vocal preparation is essential for delivering a captivating performance. Consistent practice and diligent vocal care are key to unlocking your full potential.
Warm-Up and Vocal Exercises
Before engaging in any vocal performance or recording session, warm up your voice and muscles. Engage in vocal exercises that help stretch and strengthen your vocal cords. Incorporate techniques such as lip trills, sirens, and scales to improve vocal agility, flexibility, and control. Warm-up routines prepare your voice for optimal performance and reduce the risk of strain or fatigue.
Breathing Techniques
Proper breathing techniques are fundamental for supporting your voice and maintaining control. Practice diaphragmatic breathing exercises to strengthen your core muscles and improve breath support. By mastering breathing techniques, you’ll have better control over your vocal dynamics, sustain, and overall vocal endurance.
Pitch and Tone Control
Developing pitch and tone control is vital for expressing emotions and delivering a captivating performance. Engage in exercises that focus on pitch accuracy, such as singing scales or matching pitches with a musical instrument. Practice varied vocal techniques to explore different tonal qualities and develop versatility in your vocal expression.

Stage Presence and Performance Tips
In addition to your vocal abilities, stage presence and performance techniques can greatly enhance your overall impact as an artist.
Fka Twigs’ Unique Style
Fka Twigs is known for her unique and captivating performances. Take inspiration from her stage presence and movement to develop your own distinct style. Observe her use of choreography, costumes, and visual elements to create a cohesive and immersive experience for the audience. Emulate her confidence, authenticity, and artistic expression while staying true to your own creativity.
Movement and Choreography
Incorporating movement and choreography into your performances can elevate the visual and emotional impact of your vocals. Experiment with different movements, taking into account the mood and dynamics of your music. Choreograph specific gestures or dance routines that synchronize with your vocals, adding an extra layer of interest and engagement for your audience.
Interacting with the Microphone
The microphone can be a powerful tool for expressing emotions and adding dynamics to your performance. Experiment with different ways of interacting with the microphone, such as cupping it to create a muffled effect or pulling away to create a sense of distance. These subtle movements can add depth and variety to your vocal delivery, making your performance more engaging and captivating.
Connecting with the Audience
Establishing a connection with the audience is essential for creating a memorable and impactful performance. Make eye contact, engage in meaningful gestures, and embrace opportunities for interaction. Take the time to acknowledge and appreciate the audience’s presence, allowing them to feel included and connected to your performance.
Recording and Mixing Techniques
Finally, understanding recording and mixing techniques is crucial for capturing and refining your vocal recordings.
Choosing the Right Recording Environment
Selecting the appropriate recording environment plays a significant role in the quality of your vocal recordings. Find a quiet and acoustically controlled space, free from external noise and distractions. Ideally, choose a room with appropriate acoustic treatment or consider using a vocal booth to minimize reflections and unwanted artifacts.
Microphone Placement in the Studio
Experimenting with microphone placement can greatly impact the sound captured during recording. Invest time in finding the best position for your microphone, considering factors such as distance, angle, and proximity to the sound source. A slight adjustment in microphone placement can result in a significant improvement in the clarity and quality of your vocals.
Double-Tracking Vocals
Double-tracking vocals involves recording multiple takes of the same performance, layering them together for a richer and more impactful sound. This technique adds depth, dimension, and a sense of fullness to your vocals. Experiment with double-tracking to achieve a more powerful and immersive vocal presence in your recordings.
Layering and Harmonies
Layering additional vocal tracks and harmonies can elevate the overall impact and intricacy of your recordings. Experiment with multitrack recording, adding complementary vocal lines or harmonies that enhance the main vocal part. This technique adds texture, richness, and depth to your recordings, resulting in a captivating and professional sound.
Post-Processing and Mixing
After recording, the post-processing and mixing stage allows you to refine and polish your vocal recordings. Use EQ, compression, and effects judiciously to balance and enhance the different elements of the mix. Pay attention to the overall balance, panning, and spatial placement of the vocals within the mix to ensure clarity and coherence.
Taking the time to explore and implement these techniques will deepen your understanding of microphone usage, enhance your vocal performances, and elevate the quality of your recordings. Remember that practice, experimentation, and personal expression are key to finding your unique style and achieving your desired sound. Embrace the journey and enjoy the process of discovering the right microphone, perfecting microphone techniques, and creating captivating performances that leave a lasting impression on your audience.


Add comment