So you’ve got a digital piano and you want to amplify your beautiful singing voice by connecting a microphone to it. Well, you’ve come to the right place! In this article, we will guide you through the simple steps of connecting a microphone to your digital piano, giving you the ability to showcase your vocals alongside your piano skills. With just a few easy-to-follow instructions, you’ll be belting out your favorite tunes in no time. So let’s get started on this exciting musical journey!

Table of Contents
Understanding the Basics
Digital pianos offer a variety of features that enhance the playing experience, and one of those features is the ability to connect a microphone. By connecting a microphone to your digital piano, you can amplify your voice while playing, allowing for a more dynamic and engaging performance. In this article, we will explore the different types of digital pianos and microphones, the benefits of connecting a microphone to a digital piano, and provide step-by-step instructions on how to connect a microphone to your digital piano. Whether you are a singer-songwriter, a performer, or simply enjoy playing and singing at home, this guide will help you make the most out of your digital piano and microphone setup.
Different Types of Digital Pianos
Digital pianos come in various types, each offering different features that cater to different needs and preferences. The two main types of digital pianos are upright pianos and stage pianos. Upright pianos are designed to resemble traditional acoustic pianos, with a compact and sleek design that fits well in home settings. They usually come with built-in speakers, headphone outputs, and microphone inputs, making them suitable for home use and small performances.
Stage pianos, on the other hand, are designed for more professional use and live performances. They are typically more portable and lightweight than upright pianos and offer a wider range of features, including a variety of instrument sounds, effects, and connectivity options. Stage pianos often have dedicated microphone inputs and outputs, allowing for easy integration with external audio equipment.
Different Types of Microphones
When it comes to choosing a microphone for your digital piano setup, there are several types to consider. The two most common types of microphones are dynamic microphones and condenser microphones.
Dynamic microphones are known for their durability and versatility. They can handle high sound pressure levels, making them suitable for live performances where there may be loud instruments or vocals. Dynamic microphones are also less sensitive to background noise, making them ideal for stage use.
Condenser microphones, on the other hand, are more sensitive and offer a higher level of detail and clarity. They are commonly used in studio recording settings where capturing every nuance of the performance is important. However, condenser microphones are more fragile and require an external power source, such as phantom power, to operate.
Benefits of Connecting a Microphone to a Digital Piano
Connecting a microphone to your digital piano opens up a world of possibilities for performance and musical expression. Here are some of the key benefits of connecting a microphone to a digital piano:
Amplification: By connecting a microphone, you can amplify your voice while playing the piano, allowing for a louder and more prominent vocal performance. This is especially beneficial when performing in larger venues or with a band.
Versatility: A microphone adds versatility to your playing, allowing you to experiment with different vocal styles and techniques while playing the piano. It also enables you to engage with your audience by singing along to your piano playing.
Recordings: By connecting a microphone to your digital piano, you can easily record your performances or create high-quality demos. This is particularly useful for singer-songwriters or musicians looking to share their music online.
Live Sound Reinforcement: If you regularly perform live, connecting a microphone to your digital piano allows for better control over the sound reinforcement of your vocals. You can easily adjust the volume and EQ settings of your voice to ensure a balanced and professional sound.
Now that we have explored the basics, let’s move on to the requirements for connecting a microphone to a digital piano.
Requirements
Before you can start connecting a microphone to your digital piano, you will need a few essential items. Here are the requirements for setting up a microphone with a digital piano:
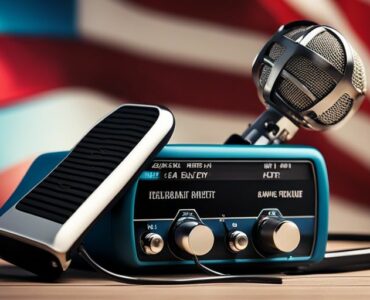
Digital Piano with Microphone Input: Ensure that your digital piano has a dedicated microphone input. Some models may have XLR or TRS inputs, while others may have a combo jack that accommodates both microphone and instrument inputs.
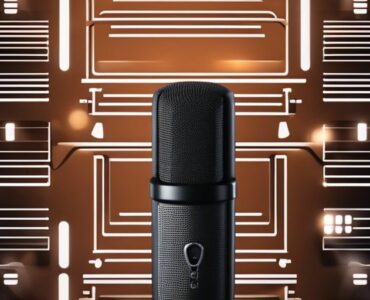
Microphone: Select a microphone that suits your needs and preferences. Consider factors such as microphone type (dynamic or condenser), polar pattern (cardioid, omnidirectional, etc.), and budget. It’s important to choose a microphone that is compatible with your digital piano’s microphone input.
Microphone Cable: You will need a suitable microphone cable to connect your microphone to the digital piano. Ensure that the cable is long enough for your specific setup and has the appropriate connectors (XLR, TRS, etc.) for your microphone and piano.
Audio Interface (optional): While not a requirement, using an audio interface can enhance the sound quality and provide additional features. An audio interface acts as an intermediary between your microphone and digital piano, converting the analog microphone signal into a digital format that can be processed by your computer or recording device. If you plan on recording or streaming your performances, an audio interface can be a valuable addition to your setup.
With the necessary requirements in place, let’s now dive into the step-by-step process of connecting a microphone to your digital piano.
Connecting a Microphone to a Digital Piano
Connecting a microphone to a digital piano is a relatively straightforward process. Follow these steps to ensure a successful connection:
Step 1: Prepare Your Digital Piano
Before connecting the microphone, make sure your digital piano is turned off. Locate the microphone input on your piano, which is typically labeled with a microphone icon. This input may be located on the front panel, rear panel, or side panel of the piano, depending on the model. Take a moment to familiarize yourself with the input’s location to avoid any confusion later on.
Step 2: Choose the Right Microphone
Choose the microphone that best suits your needs and preferences. Consider factors such as microphone type, polar pattern, and budget. If you are unsure about which microphone to choose, consult with a music retailer or knowledgeable musician for guidance.
Step 3: Connect the Microphone to the Digital Piano
Take the microphone cable and connect one end to the microphone. Ensure that the connectors are securely in place. Next, take the other end of the cable and plug it into the microphone input on your digital piano. Make sure the connection is secure but avoid applying excessive force to prevent damage to the connectors.
Step 4: Adjust Microphone Settings on the Digital Piano
Once the microphone is connected, turn on your digital piano. Locate the microphone settings in the piano’s menu or control panel. Depending on the model, you may be able to adjust various settings such as microphone volume, EQ, and effects. Experiment with these settings to find the optimal sound for your voice and performance style.
Step 5: Test the Connection
To ensure that the microphone is working correctly, play a few notes on the piano while speaking or singing into the microphone. Monitor the sound through headphones or the piano’s built-in speakers. If you hear your voice amplified along with the piano sounds, congratulations! Your microphone is successfully connected to your digital piano.
In the next section, we will address common issues that may arise when connecting a microphone to a digital piano and provide troubleshooting tips to resolve them.
Troubleshooting Common Issues
While connecting a microphone to a digital piano is a relatively simple process, you may encounter some common issues along the way. Here are a few troubleshooting tips to help you resolve them:
No Sound from the Microphone
If you are not hearing any sound from the microphone when connected to the digital piano, first ensure that the microphone and piano are both turned on. Next, check the microphone cable connections to make sure they are secure. If the issue persists, try using a different microphone cable to eliminate the possibility of a faulty cable.
Poor Sound Quality
If the sound quality from the microphone is not satisfactory, check the microphone settings on the digital piano. Adjust the microphone volume and EQ settings to find the optimal balance. If the issue persists, try using a different microphone to see if the poor sound quality is due to a faulty microphone.
Audio Lag
If you are experiencing a delay or latency between playing the piano and hearing the amplified sound, it may be due to processing latency within the digital piano. Check if your piano has a “Direct Monitor” feature or a similar setting that allows you to monitor the microphone input with minimal latency. If not, consider using an audio interface to bypass the piano’s internal processing and reduce latency.
Excessive Background Noise
If you notice excessive background noise when using the microphone, check for any nearby sources of interference, such as electrical equipment or sources of wireless signals. Move away from these sources or ensure that they are properly shielded. If the issue persists, consider using a microphone with a narrower polar pattern, such as a cardioid microphone, which is less sensitive to sounds coming from the sides and rear.
Incompatibility Issues
If you are experiencing compatibility issues, such as the microphone not working with your digital piano, check the microphone specifications and ensure that it is compatible with your piano’s microphone input. Consult the user manual or contact the manufacturer for further assistance. In some cases, using an audio interface can help resolve compatibility issues by providing a standardized audio connection.
Now that we have addressed some common troubleshooting tips, let’s explore the option of using an audio interface to enhance your microphone and digital piano setup.

Using an Audio Interface
What is an Audio Interface?
An audio interface is an external device that connects to your computer or recording device and provides additional functionality for audio input and output. It serves as a bridge between your microphone and digital piano, allowing you to capture and process high-quality audio.
Benefits of Using an Audio Interface
Using an audio interface with your microphone and digital piano setup offers several benefits:
Improved Sound Quality: Audio interfaces often feature high-quality preamps that provide cleaner and more accurate recordings. They also support higher sampling rates and bit depths, resulting in better audio fidelity.
Flexibility: Audio interfaces offer a range of input and output options, including XLR, TRS, and MIDI connections. This allows you to connect multiple microphones, instruments, and other audio devices to your digital piano setup.
Low Latency Monitoring: Most audio interfaces feature direct monitoring capabilities, allowing you to hear your microphone input in real-time with minimal latency. This is especially useful when recording or performing live.
Connecting a Microphone to a Digital Piano using an Audio Interface
To connect a microphone to your digital piano using an audio interface, follow these steps:
Connect your microphone to one of the audio interface’s microphone inputs using a suitable microphone cable.
Connect the audio interface to your computer or recording device using a USB or Thunderbolt cable, depending on the interface’s connectivity options.
Configure your audio interface with your computer or recording software, following the manufacturer’s instructions. Set the input source to the microphone connected to the audio interface.
Connect the audio interface to your digital piano using suitable cables, depending on the interface’s output options and your piano’s inputs. This may involve using XLR, TRS, or MIDI cables, depending on your specific setup.
Adjust the microphone settings on your digital piano and audio interface as needed. Experiment with different recording settings to achieve the desired sound.
Using an audio interface can greatly enhance the sound quality and versatility of your microphone and digital piano setup. However, it is not a mandatory component and may not be necessary for all users.
In the next section, we will provide some tips for optimal microphone use with a digital piano.
Tips for Optimal Microphone Use
To get the best results when using a microphone with your digital piano setup, consider the following tips:
Positioning the Microphone
Experiment with microphone placement to find the best position for capturing your voice and piano sound. Start by positioning the microphone at a comfortable distance from your mouth, aiming for consistent and balanced sound. Adjust the angle and distance to minimize unwanted noise and achieve optimal sound quality. It is also beneficial to position the microphone away from any air vents or sources of airflow to minimize wind noise or unwanted artifacts.
Using Pop Filters
To avoid plosive sounds, such as “p” and “b” sounds, consider using a pop filter. A pop filter is a screen-like accessory that is placed in front of the microphone to reduce the impact of plosive sounds on the microphone capsule. This helps to achieve cleaner and clearer vocal recordings.
Setting the Right Microphone Gain
Proper microphone gain setting is crucial for obtaining clean and distortion-free recordings. Start with a low microphone gain setting and gradually increase it while monitoring the audio levels. Aim for a signal that is loud enough to be clearly heard without clipping or distorting. Adjust the microphone gain accordingly until you achieve the desired balance between volume and clarity.
Recording Techniques
Experiment with different recording techniques to capture the best sound from your digital piano and microphone setup. Consider techniques such as close-miking, where the microphone is placed close to the source for a more intimate sound, or room-miking, where the microphone captures the natural ambiance of the room. The choice of recording technique will depend on the desired sound and the acoustic characteristics of the recording environment.
Now that you have a better understanding of optimal microphone use, let’s delve into maintenance and care tips to ensure the longevity of your microphone.

Maintenance and Care
Taking proper care of your microphone is essential to ensure its longevity and optimal performance. Here are some maintenance and care tips to keep in mind:
Cleaning the Microphone
Regularly clean your microphone to remove any dirt, dust, or debris that may affect its performance. Use a soft, lint-free cloth to gently wipe the microphone body and grille. Be careful not to apply excessive pressure or use any harsh cleaning agents that may damage the microphone.
Proper Storage
When not in use, store your microphone in a safe and dry environment. Keep it away from extreme temperatures, moisture, and dust. Invest in a microphone case or pouch to protect it from accidental damage during transportation.
Regular Check-ups
Periodically inspect your microphone for any signs of damage or wear and tear. Check the microphone cable for any frayed or exposed wires and replace it if necessary. If you notice any unusual behavior or deterioration in sound quality, consult with a professional technician or contact the microphone’s manufacturer for assistance.
By following these maintenance and care tips, you can ensure that your microphone remains in optimal condition and delivers consistent performance for years to come.
Conclusion
Connecting a microphone to your digital piano can transform your musical experience and open up new possibilities for performance and creativity. By understanding the basics of digital pianos and microphones, choosing the right equipment, and following the step-by-step instructions provided in this article, you can successfully connect a microphone to your digital piano and enjoy amplified vocals and enhanced recordings.
Remember to consider your specific needs and preferences when selecting a microphone, and don’t hesitate to seek professional advice if you encounter any issues along the way. With the right setup and proper care, your microphone and digital piano combination can bring your musical performances to new heights. Enjoy exploring the possibilities of your new microphone and digital piano setup, and let your creativity soar!


Add comment