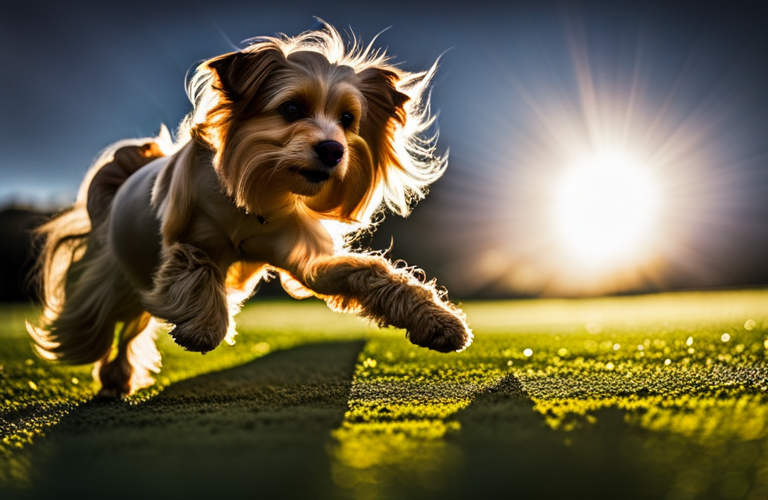
Hey there, dog lovers! If you've ever watched a dog agility competition and marveled at the incredible skills and speed of those four-legged athletes, then get ready because I have some fantastic news for you. In this how-to guide, I will be showing you, step by step, how to set up your very own backyard dog agility course. That's right, no need to travel to fancy training facilities or spend tons of money on expensive equipment – with just a little creativity and a few basic supplies, you can create a challenging and exciting course right in your very own backyard. So grab your furry friend, roll up your sleeves, and let's dive into the wonderful world of dog agility!
Table of Contents
Quick Tips
Tip 1: Choose a flat and spacious area in your backyard for your dog's agility course. Clear any obstacles or debris to provide a safe and open space for your pup to run around.
Tip 2: Gather some common materials to create agility obstacles. Use PVC pipes to build jumps, weave poles using pool noodles, and tunnels using large cardboard boxes. These materials can be easily found at your local hardware store.
Tip 3: Set up the obstacles in a strategic manner, ensuring that there is enough space between each one for your dog to maneuver. Start with simple obstacles like jumps and tunnels, gradually increasing the difficulty as your dog becomes more skilled.
Tip 4: Train your dog gradually and patiently. Start by introducing each obstacle one at a time, giving your dog clear commands and positive reinforcement when they successfully complete it. Practice regularly to enhance their agility skills and bond with your furry friend.
Outline the course using sturdy materials like cones or PVC pipes
You can outline a course in a more efficient way by using durable materials like cones or PVC pipes. These materials will take a beating outdoors and can hold their shape for years to come. To begin, gather the necessary materials such as cones or PVC pipes and determine the layout of your course. Take into consideration factors such as the space available, the desired difficulty level, and any specific objectives you may have. Once you have a clear plan in mind, begin placing the cones or PVC pipes in the designated areas to create a course that is both challenging and safe for participants.
Next, it's essential to secure the cones or PVC pipes firmly in place. This not only ensures that the course remains intact during use but also prevents potential injuries caused by the course shifting or falling over. To achieve this, place the cones or PVC pipes securely into the ground or place sandbags or weights on top to hold them in place. By taking this simple step, you can create a course that is stable and ready for participants of all ages and skill levels.
Last but not least, if you wish to enhance the course experience, include some visual cues or markers. This can be done by using colorful flags or ribbons tied to the cones or PVC pipes. These visual cues can help guide participants through the course and make it more engaging. Additionally, by using different colors or patterns, you can create variations within the course to offer different levels of difficulty. This allows participants to choose their own adventure and challenge themselves accordingly. With these tips and tricks in mind, you can successfully outline a course using sturdy materials like cones or PVC pipes and create an exciting and enjoyable experience for all.
Outline the course using sturdy materials like cones or PVC pipes
Incorporate jumps, tunnels, and weave poles into your course
Are you ready to take your dog agility game to the next level? Then it's time to incorporate jumps, tunnels, and weave poles into your course! These obstacles will add excitement and challenge to your training sessions and help improve your dog's agility skills. Let's get started!
Firstly, let's talk about jumps. Jumps are a fundamental element in any agility course. To incorporate jumps into your course, start by setting up a low jump and gradually increase the height as your dog becomes more comfortable. Use treats and positive reinforcement to encourage your dog to jump over the bar. Remember to give clear cues, such as “jump” or “over,” and always reward your pup for their efforts. With practice, your dog will become a pro at jumping!
Next, let's tackle tunnels. Tunnels are great for testing your dog's speed and agility. To introduce tunnels to your course, start with a short and straight tunnel. Place a treat at the end to entice your dog to run through it. Use a happy and excited tone to encourage your dog to explore the tunnel. Gradually increase the length and add curves to make it more challenging. Practice running through the tunnel together, and soon enough, your pup will be zooming through like a champ!
Lastly, let's weave through some poles. Weave poles require focus and agility from your dog. To incorporate them into your course, set up a line of weave poles and guide your dog through using treats. Start with a few poles at a wider distance and slowly decrease the spacing as your dog gets comfortable. Use a cue word like “weave” or “around” to let your dog know what you want them to do. With patience and practice, your furry friend will master the art of weaving through those poles!
Your dog's agility skills will be challenged and improved by incorporating jumps, tunnels, and weave poles into your course. Remember to be patient, use positive reinforcement, and have fun with the process. Before you know it, you and your pup will be blazing through courses like true agility pros!
Ensure proper spacing between obstacles for safe navigation
When navigating through obstacle courses or unfamiliar terrain, it is crucial to ensure proper spacing between obstacles for safe navigation. By following these simple guidelines, you can minimize the risk of accidents and injuries. First, assess the width of the space available and the size of the obstacle. Make sure there is enough distance between the obstacles to comfortably fit through without bumping into anything. This will prevent any chances of tripping or getting stuck in narrow spaces.
Once you have determined the appropriate spacing, be sure to maintain a steady pace when maneuvering through the obstacles. Rushing can lead to misjudging the distance between each obstacle and increase the likelihood of collisions. Take your time and carefully plan your movements, allowing for ample space to avoid any potential accidents. Remember, it's better to take a few extra seconds to ensure a safe passage than to risk injury by rushing through.
Last but not least, always stay focused and aware of your surroundings while you navigate. Keep an eye out for any sudden changes in the environment that could affect your path. This could include loose rocks, tree branches, or even other people. By staying alert and attentive, you can make split-second decisions to adjust your path and maintain a safe distance from potential obstacles. In the end, ensuring proper spacing between obstacles for safe navigation relies on being cautious, observant, and taking the time to plan and execute your movements carefully.
Gradually increase difficulty level as your dog becomes more adept
Imagine you have a new puppy, and you want to teach them some basic commands like sit, stay, and come. One effective method is to gradually increase the difficulty level as your dog becomes more adept at each command. To begin with, you can start by training your dog in a quiet and distraction-free environment. This allows them to focus solely on learning the command without any added challenges.
Once your dog has mastered the command in this controlled environment, you can then begin to introduce distractions gradually. For example, you can practice the “sit” command with your dog while a family member walks past or while you toss a toy nearby. By gradually adding distractions, your dog will learn to remain focused on the command despite any distractions that may be present. This gradual increase in difficulty ensures that your dog builds on their skills and improves their training abilities.
As your dog becomes more adept at following commands in various settings, you can then further increase the difficulty level. This can involve practicing the commands in different locations such as parks or busy streets. You can also introduce more challenging distractions such as other dogs or loud noises. By gradually exposing your dog to these different scenarios, you are preparing them to respond to commands in real-life situations. Remember to always be patient and encouraging during the training process, as it takes time for your dog to become proficient.
Conclusion
The setting up of a dog agility course in your own backyard can prove to be a fun and rewarding experience for you and your four-legged friend. By following a few simple steps, such as choosing a flat area, outlining the course with sturdy materials, and incorporating various obstacles, you can create an engaging agility course that will provide hours of entertainment and exercise for your dog. Not only will it enhance your bond with your pet, but it will also improve their physical and mental well-being. So why not take the leap and create your own backyard agility course today – it's an investment in both your dog's happiness and your own!
FAQ
Q: Why should I set up a backyard dog agility course?
A: Setting up a backyard dog agility course allows you and your dog to bond, exercise together, and stimulate both their mind and body. It's a fun and challenging activity that can improve obedience, agility, and overall health for your four-legged companion.
Q: What equipment do I need to set up a backyard dog agility course?
A: The essential equipment includes jumps, tunnels, weave poles, an A-frame, a see-saw, and a pause table. However, you can start with just a few basic items and gradually expand your course as you and your dog progress.
Q: Where can I obtain the necessary equipment for a backyard dog agility course?
A: Depending on your budget, you have several options. You can purchase equipment online from specialized dog agility retailers or find used equipment through classified ads, online forums, or local dog agility clubs. You can also make some equipment yourself using readily available materials like PVC pipes, tires, and wooden planks.
Q: How much space do I need to set up a backyard dog agility course?
A: The space required depends on the size of your dog and the layout of the equipment. A backyard with a minimum of 20 x 40 feet is sufficient for a small dog, while larger dogs may require more space. It's important to ensure your dog has enough room to safely complete the obstacles and that the course is clear of any hazards.
Q: How do I introduce my dog to the backyard agility course?
A: Gradual introduction is key. Begin by allowing your dog to explore the equipment one by one without any pressure. Use treats and positive reinforcement to build their confidence and associate the equipment with fun. Start at a slower pace, gradually increasing difficulty as their familiarity and skills progress.
Q: Are there any safety precautions I should take while using a dog agility course?
A: Yes, safety should be a top priority. Always supervise your dog during agility training. Ensure the equipment is secure, stable, and safe to use. Regularly inspect the course for any damage or wear that could pose a risk. Make sure your dog is properly warmed up before training and that the surface they're running on is free of slippery or sharp objects.
Q: Can any dog participate in dog agility training?
A: While most healthy dogs can participate, it's important to consider your dog's breed, age, and physical condition. Some breeds are more agile and inclined towards this type of activity, such as Border Collies and Shetland Sheepdogs. However, almost all dogs can benefit from agility training as long as it's tailored to their abilities and limitations.
Q: How do I train my dog to navigate the agility course?
A: Positive reinforcement is key to training your dog for the agility course. Break each obstacle down into small steps and use treats and praise to encourage them. Use target training to guide them through the course, gradually removing the prompts as they become more confident. Seek professional trainers or join local dog agility classes for guidance if needed.
Q: Can I compete with my dog on a backyard agility course?
A: While backyard agility is primarily for recreational purposes, you can still participate in non-competitive events such as fun matches or local agility demonstrations. If you later decide to pursue competitive agility, you may need to train on regulation-sized equipment and join official agility clubs or organizations.
Q: How often should I train my dog on the backyard agility course?
A: Consistency is key. Plan regular training sessions with your dog, ensuring they get adequate physical exercise and mental stimulation. Initially, shorter sessions a few times a week are sufficient. As your dog progresses and gains more endurance, you can increase the frequency and duration of training sessions.
Remember, creating a backyard dog agility course is meant to be enjoyable for both you and your furry friend. Always prioritize safety, make adjustments based on your dog's abilities, and have fun exploring this exciting activity together.


Add comment