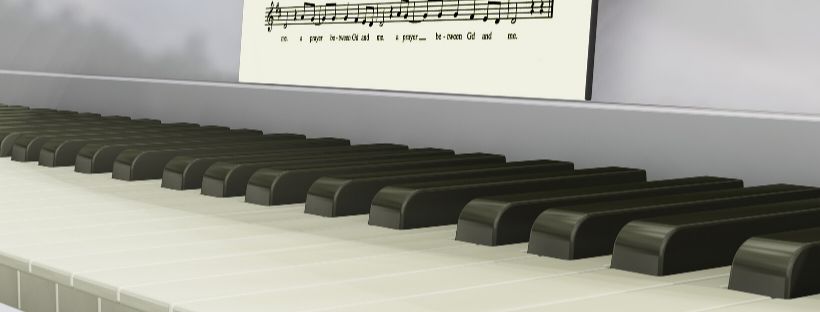

If you don’t know how to clean piano keys, here’s all the correct info that’ll help you get the job done! Regular maintenance is a must when you’re in need of a stellar performance from your piano.
When dust builds up and a little moisture adds in, there’s a high chance of your piano keys bearing the brunt. Since your keys are at the receiving end of your fingers than other parts of the keyboard, it’s naturally the dirtiest spot.
That’s why your cleaning piano keys should be the initial step in your maintenance effort. If you’re looking for the best ways on how to clean piano keys, here’s everything you need to know;
Table of Contents
Ivory Keys vs. Plastic Keys
Prior to getting the cleaning agent ready, you’ve got to know what’s different between the two main keys in circulation – ivory and plastic.
In the old days, ivory was the gold standard. But due to recent advancements in the design of pianos, there’re other variants available.
If you’re currently using an ivory keyboard, it’s got a very different cleaning process than plastic keys. Here’s what you need to know;
How to Clean Your Plastic Keys
What do you need?
- Dry cloth (high thread count or extra smooth)
- Spray bottle
- Low concentration detergent (one-and-a-half tablespoons)
- Water
Step by step guide to clean piano plastic keys
- Get the plastic keys properly dusted with a dry cloth to remove any dust or dirt. You can use a soft brush if you want to be thorough.
- Add detergent to spray bottle and fill with water. Note you need a small-sized spray bottle and not a large one.
- Get a high thread count piece of cloth such as a rag with high cleaning potential. It must be clean for you to achieve the best results.
- Spray the solution onto cloth and work around your keys with no pressure at all. Note that you must not spray onto your keys directly to avoid damage.
- Go through each key gradually and make sure you get to the spots with the most stains.
- Clean the key tops with no force applied, then go to the front end to make a thorough clean.
How to Clean Your Ivory Keys
Cleaning ivory piano keys is a bit straightforward. But you’ve got to do it right to get the best result. Here’re the steps you’ve got to follow;
Using Water & Vinegar
- Get a clean cloth with a high thread count to ensure the cleaning process is faster
- Take a little vinegar and add into water, mixing thoroughly
- Apply the solution on your piano’s keys and rub gently across
- Don’t apply too much solution on the keys to avoiding clogged sides
Using Toothpaste & Lint-free cloth
- Get white toothpaste
- Apply on a lint-free cloth
- Rub gently on the keys until you notice the dirt coming off
- Use another part of the lint-free cloth dipped in milk
- Clean off the toothpaste residue
- Allow drying
Things to Avoid When Cleaning Your Piano Keys
1. Leaving your piano uncovered
Whenever you’re not in tune with your inner Beethoven, it’s perfect you get the piano fully covered.
A dust cover won’t cost you much. But getting your keys replaced surely will.
2. Key scraping
Scraping your piano’s keys is a colossal no-no. Using sharp objects such as knives could dull the smooth finish on your keys.
And it’ll surprise you that scraping actually exposes your keys to the dirt you’ve been trying to avoid. The smooth finish of your piano’s keys delivers a smooth touch but also prevents dirt from sticking.
If you’re currently thinking about getting your keys scraped, it’s a great choice to enlist the services of a pro in getting your keys cleaned. Being a DIY guy in this aspect will surely be of no help.
3. Use of harmful chemical solutions
Using chemical solutions with whitening properties is another thing you should avoid when getting your keys cleaned.
A lot of folks engage harmful stuff in cleaning their keyboards, but it’s the result that showcases the colossal mistake they make.
Chemical solutions have a high concentration that cheaply wears out all the fine coatings used on your keys. if such chemicals are used in cleaning your keys, you expose your keyboard’s keys to everything you don’t like.
You may notice their outlook garnering a yellow coloring, and these uncovered keys may easily retain your dirty fingerprints.
So don’t ever look towards getting harsh chemicals in cleaning your keys, use something conventional instead.
4. Making use of scouring powder
Scouring powder isn’t the answer too. These powders are made with smoothed abrasive substances.
When you engage scouring powder in cleaning your keys, you’re simply eroding the smooth finish your keys came along with.
Cleaning off your keys’ dirt may seem ideal in the first instance, but when stored in a dusty area, dirty fingers, and more set in, you’d notice your error in an instant.
Scouring powder isn’t the answer, believe me!
5. Excess moisturizing
Using excess water during your keyboard’s cleaning process will limit the results you notice in the long run.
Your keys will soak in too much water, and there’s a chance of the outer finish getting washed off.
What you need to do is get enough water into your chosen solution and apply sparingly on the key’s surface without letting water seep in.
6. Grime build-up
Adding too much water to your cleaning solution is the primary cause of dirt and grime build-up. If you’ve accidentally spilled liquid into your keys, it could cause grime too.
Ensure your keys remain as dry as can be when cleaning through as dust and water can easily form underneath your keys.
7. Harsh cleaning agent
Don’t be tempted to use your toilet’s cleaning solution on your piano. It could react in an undesirable manner, warping your keys out in the process.
Conclusion
Everyone loves their piano without a doubt. And since there’re so many memorable moments you get from using a piano, what’s not to love? It’s certain you’ve got a special attachment to your piano and play it for hours on end.
There’s something you’ve got to know anyway, and that’s the increased chance of your piano getting dirt and grime built-up easily.
Even if you don’t make use of your piano often, there’s still a great chance it’ll pack up dust in storage.
So with the info you’ve gotten for free in this read, you can naturally keep your piano keys in top shape and make the most from your music investment.
Also Check Out on Yamaha P45 Piano


Add comment